Brady Adventures is where we document the evolution of our builds from Land Cruiser overlanding to our 2024 Acura Integra A-Spec Tech and other family sport compact cars. You’ll find detailed installs, reviews, and trip content as we explore both trails and the street.
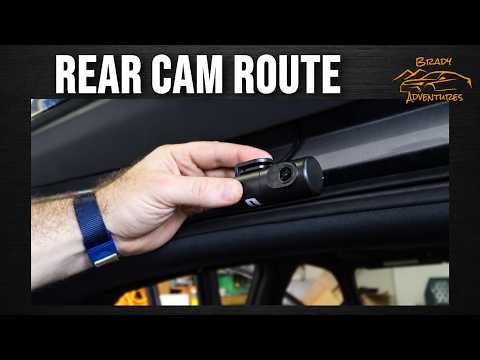
The rear camera install is the second half of the Mangoal dash cam setup on the 2024 Acura Integra A-Spec.
The front camera install handled the clean mirror-area fitment and power connection. This rear camera video is about the part most people want to understand before they start: where to place the rear camera, how to route the cable, how much trim work is involved, and whether the two-channel setup still looks clean after everything is tucked away.
Mangoal provided the dash cam to Brady Adventures for install/review coverage. My opinions are my own. The full review still needs to cover day footage, night footage, app behavior, GPS/privacy settings, and long-term owner experience.
If you are installing a rear dash cam in a hatchback-style car like the Integra, take your time with cable routing and trim placement. The clean result is worth it, but the rear camera is where the install becomes more than a simple front-camera swap.
In this part of the Integra dash cam series, I install the front camera housing on my 2024 Acura Integra A-Spec. The setup is designed to hide behind the factory mirror area, so the big questions are fitment, trim removal, power connection, and whether the installed camera actually looks clean once the trim goes back together.
Mangoal provided the dash cam to Brady Adventures for install/review coverage. My opinions are my own, and the follow-up videos will cover the rear camera, app behavior, day footage, night footage, and whether I would keep the kit installed.
Viewer Q&A: this kit does not include a cabin camera. It records front and rear video plus audio. I will cover the rear install and owner-experience questions in the next parts of the series.
If you are installing a dash cam in a 2023-2025 Acura Integra, the front install is the cleaner half of the job. The rear camera routing is where I expect more of the real work to show up.
The 2008 Civic Si sedan FA5 needed a simple but very visible exterior refresh: the window sill weatherstrip / belt molding had dried out, broken down, and was no longer doing much sealing. In this Brady Adventures video, the old belt moldings come off and a full aftermarket replacement set goes on all four doors.
This is not presented as a perfect factory-service-manual how-to. The video shows the real learning process: stubborn old trim, plastic clips that are basically designed to break, cheap pry tools that are not always strong enough, and the extra care needed if your paint is in better shape than this Civic's already-worn clear coat.
Part numbers referenced for the 2008 Civic Si sedan FA5:
Front right/passenger window sill weatherstrip / belt molding: 72410-SNA-A01
Front left/driver window sill weatherstrip / belt molding: 72450-SNA-A01
Rear right/passenger window sill weatherstrip / belt molding: 72910-SNA-A01
Rear left/driver window sill weatherstrip / belt molding: 72950-SNA-A01
Disclosure: Some links may be affiliate links that help support Brady Adventures at no extra cost to you.
What The Install Was Really Like
The old seals were in rough shape and came apart as they were removed. Masking tape helped protect the paint around the window line, but the job still takes patience because the retaining clips can stay stuck in the door or break away from the old molding.
The basic process was to work under the rubber and trim, pry upward, remove the leftover clip pieces, clean the channel, and then line up the new belt molding so the back seal and clips seated correctly. Gloves helped once the trim started coming apart, and a stronger set of plastic pry tools would make the job less frustrating.
The driver side improved quickly once the technique started to make sense. The passenger side went faster, but the same warning still applies: if your paint is nice, go slowly, use tape, and be careful around the glass and clear coat.
Final Verdict
For the money, the aftermarket set made the Civic look a lot cleaner. The fresh flat black window line is a big visual improvement over the worn-out old seals, and all four doors looked much better when the job was done.
The tradeoff is fit and finish. The inexpensive set used in the video was not perfectly precise, and one area did not lock in as cleanly as expected. OEM pieces would probably align better, but they cost much more per door. For a budget exterior refresh on an older FA5 Civic Si, the aftermarket set still made sense.
In this Brady Adventures video, Chuck replaces the oxygen sensor on an 8th Gen Honda Civic and walks through the access, tools, removal, install, and final check after the repair.
This is the highest-return missing post because O2 sensor replacement is a practical search-driven repair topic. The video also includes tool/product links that can support the channel when the disclosure is kept in place.
Watch the Full Video
What This Video Covers
Civic O2 sensor replacement overview
Parts and tool setup before starting
Accessing the oxygen sensor
Removing the old sensor and installing the replacement
Checking the result after the repair
Parts, Tools & Affiliate Links
Some links may be affiliate links that help support Brady Adventures at no extra cost to you. These links came from the public YouTube description; verify or update them before publishing if anything has changed.
Brady Adventures is documenting practical DIY installs, OEM+ upgrades, honest ownership notes, and the channel's shift from overlanding into Acura Integra, Honda Civic, and sport compact projects.
What code or symptom brought you to an O2 sensor replacement? Drop a comment on the video so other Civic owners can compare notes.
In this video, Chuck installs OEM illuminated door sills on the Acura Integra, showing how this interior upgrade changes the look of the cabin, especially at night.
This is a strong OEM+ accessory post because it connects directly to the recent Integra lighting series and has clear internal-link value.
Watch the Full Video
What This Video Covers
OEM illuminated door sill overview
Tools and trim prep
Removing the factory trim
Routing the wiring
Installing and testing the illuminated sills
Final nighttime result
Parts, Tools & Affiliate Links
Some links may be affiliate links that help support Brady Adventures at no extra cost to you. These links came from the public YouTube description; verify or update them before publishing if anything has changed.
Brady Adventures is documenting practical DIY installs, OEM+ upgrades, honest ownership notes, and the channel's shift from overlanding into Acura Integra, Honda Civic, and sport compact projects.
Worth it, or would you spend the money on a different Integra upgrade first? Comment on the video with your take.
This quick how-to shows how to remove and reinstall a manual transmission shift knob on a 5th gen Acura Integra while protecting the shift boot, collar, and surrounding trim.
Short but useful. This fills a specific DIY search query and links naturally into the Integra interior series.
Watch the Full Video
What This Video Covers
Loosening and removing the manual shift knob
How the shift boot and collar come apart
Trim and alignment cautions
Reinstalling and aligning the knob correctly
Tips for similar threaded manual Honda and Acura shift knobs
Parts, Tools & Affiliate Links
Some links may be affiliate links that help support Brady Adventures at no extra cost to you. These links came from the public YouTube description; verify or update them before publishing if anything has changed.
Brady Adventures is documenting practical DIY installs, OEM+ upgrades, honest ownership notes, and the channel's shift from overlanding into Acura Integra, Honda Civic, and sport compact projects.
If this helped, comment with your Honda or Acura model and whether the boot/collar setup matched yours.
In this video, I upgraded all of the interior lighting in my Acura Integra — replacing the stock white LEDs with red ones (Civic Type R Part#) throughout the cabin.
This fits the OEM+ direction of the channel: useful, clean, and focused on real-world ownership rather than going over the top.
Watch the Full Video
Watch the full Brady Adventures video here:
What This Video Covers
This is a full OEM LED replacement, converting the factory lighting to red for a more aggressive OEM+ look.
Door handle lighting
Door accent lighting
Center console lighting
The result completely transforms the feel of the interior — especially at night.
This install requires removing the door panels — full guide below 👇
OEM LED replacement (white → red)
Why This Small Detail Works
Lighting changes can completely alter the feel of the car at night. The goal here is a clean OEM+ look that feels intentional instead of aftermarket clutter.
Parts, Tools & Affiliate Links
These are the product/tool links from the YouTube description. Some may be affiliate links, which help support Brady Adventures at no extra cost to you.
We are building the Brady Adventures garage around practical DIY installs, OEM+ upgrades, honest product impressions, and real-world ownership. The current focus is the Acura Integra DE4 / 11th gen Civic platform, with Civic projects and family builds joining the channel along the way.
If you have a question about this install or want to see a specific comparison, drop a comment on the YouTube video and follow along with the next stage of the build.
In this video, I install OEM Acura door logo projectors on my Acura Integra but with a twist. I modified them with red tint to match my interior lighting, giving them a much more aggressive OEM+ look. These projectors illuminate the Acura logo onto the ground when you open the door, and this small change makes a big impact.
The goal is to make the job feel approachable before you start taking parts off the car.
Watch the Full Video
Watch the full Brady Adventures video here:
What This Video Covers
This install requires removing the door panel
OEM Acura Door Logo Projector Instructions
OEM projector install
Red tint customization
Why This Small Detail Works
Lighting changes can completely alter the feel of the car at night. The goal here is a clean OEM+ look that feels intentional instead of aftermarket clutter.
Parts, Tools & Affiliate Links
These are the product/tool links from the YouTube description. Some may be affiliate links, which help support Brady Adventures at no extra cost to you.
We are building the Brady Adventures garage around practical DIY installs, OEM+ upgrades, honest product impressions, and real-world ownership. The current focus is the Acura Integra DE4 / 11th gen Civic platform, with Civic projects and family builds joining the channel along the way.
If you have a question about this install or want to see a specific comparison, drop a comment on the YouTube video and follow along with the next stage of the build.
In this video, I show how to remove the front door panel on a 5th gen Acura Integra (DE4/DE5) and 11th gen Honda Civic (including Si and similar models).
The goal is to make the job feel approachable before you start taking parts off the car.
Watch the Full Video
Watch the full Brady Adventures video here:
What This Video Covers
This step-by-step guide walks through all the screws, clips, and techniques needed to safely remove the panel without damaging anything.
Door logo projectors
Interior LED lighting upgrades
Illuminated door sills
If you're planning any of these mods, this video will walk you through the first step.
👇 Let me know what you're planning to install.
Door projector install
Why This Guide Matters
Door panel removal is the first step for a lot of the best Civic and Integra upgrades: puddle lights, speaker work, illuminated trim, and interior lighting. Getting the clips and hidden fasteners right matters more than using force.
Before You Start
Take your time, use plastic trim tools where possible, and keep track of each screw and clip location so reassembly is clean.
Parts, Tools & Affiliate Links
These are the product/tool links from the YouTube description. Some may be affiliate links, which help support Brady Adventures at no extra cost to you.
We are building the Brady Adventures garage around practical DIY installs, OEM+ upgrades, honest product impressions, and real-world ownership. The current focus is the Acura Integra DE4 / 11th gen Civic platform, with Civic projects and family builds joining the channel along the way.
If you have a question about this install or want to see a specific comparison, drop a comment on the YouTube video and follow along with the next stage of the build.
Here’s the full before and after sound of the Invidia N1 exhaust on our 10th gen Civic.
This post is for anyone trying to decide whether the sound and personality change are worth it before buying parts.
Watch the Full Video
Watch the full Brady Adventures video here:
What This Video Covers
Here’s the full before and after sound of the Invidia N1 exhaust on our 10th gen Civic.
We also share our honest first impressions after hearing it in person.
Invidia N1 Cat-Back Exhaust System | 2016-2021 Honda Civic 1.5T Sedan (HS16HC46GT1GT)
Civic X Forum Invidia N1 Exhaust Review
Why This Mod Changes the Car
An exhaust is one of those upgrades you feel every time you start the car. The Invidia N1 gives the Civic a more aggressive personality, but the real question is whether it stays livable for daily use.
What to Watch For
Pay attention to hanger removal, exhaust alignment, tip placement, and how the sound changes from cold start to driving clips.
Parts, Tools & Affiliate Links
These are the product/tool links from the YouTube description. Some may be affiliate links, which help support Brady Adventures at no extra cost to you.
We are building the Brady Adventures garage around practical DIY installs, OEM+ upgrades, honest product impressions, and real-world ownership. The current focus is the Acura Integra DE4 / 11th gen Civic platform, with Civic projects and family builds joining the channel along the way.
If you have a question about this install or want to see a specific comparison, drop a comment on the YouTube video and follow along with the next stage of the build.
In this video, we install the Invidia N1 catback exhaust on my daughter’s 10th gen Civic — her very first car mod.
The goal is to make the job feel approachable before you start taking parts off the car.
Watch the Full Video
Watch the full Brady Adventures video here:
What This Video Covers
In this video, we install the Invidia N1 catback exhaust on my daughter’s 10th gen Civic — her very first car mod.
This was a great learning and bonding experience and a reminder that a lot of these installs are more approachable than they seem.
We walk through the full install process, what tools you need, and how difficult it actually is for a first-time install.
First look / sneak peek
Full install (this video)
Before & after sound test (coming next)
If you’ve ever thought about doing your own mods — or helping your kids get into cars — this is a great place to start.
Why This Mod Changes the Car
An exhaust is one of those upgrades you feel every time you start the car. The Invidia N1 gives the Civic a more aggressive personality, but the real question is whether it stays livable for daily use.
What to Watch For
Pay attention to hanger removal, exhaust alignment, tip placement, and how the sound changes from cold start to driving clips.
Parts, Tools & Affiliate Links
These are the product/tool links from the YouTube description. Some may be affiliate links, which help support Brady Adventures at no extra cost to you.
We are building the Brady Adventures garage around practical DIY installs, OEM+ upgrades, honest product impressions, and real-world ownership. The current focus is the Acura Integra DE4 / 11th gen Civic platform, with Civic projects and family builds joining the channel along the way.
If you have a question about this install or want to see a specific comparison, drop a comment on the YouTube video and follow along with the next stage of the build.
We finally picked up the Invidia N1 catback exhaust for Mac's 10th gen Civic and this is just the beginning.
This is the planning/preview side of the build, showing what is coming and why these parts made the list.
Watch the Full Video
Watch the full Brady Adventures video here:
What This Video Covers
We finally picked up the Invidia N1 catback exhaust for Mac's 10th gen Civic and this is just the beginning.
In this video, we take a first look at the exhaust, check out the build quality, and preview what’s coming next in the install.
Installing the Invidia N1 step-by-step
Comparing before vs after sound
Sharing driving impressions and whether it’s actually worth it
Invidia N1 Cat-Back Exhaust System | 2016-2021 Honda Civic 1.5T Sedan (HS16HC46GT1GT)
Civic X Forum Invidia N1 Exhaust Review
Why This Mod Changes the Car
An exhaust is one of those upgrades you feel every time you start the car. The Invidia N1 gives the Civic a more aggressive personality, but the real question is whether it stays livable for daily use.
What to Watch For
Pay attention to hanger removal, exhaust alignment, tip placement, and how the sound changes from cold start to driving clips.
Parts, Tools & Affiliate Links
These are the product/tool links from the YouTube description. Some may be affiliate links, which help support Brady Adventures at no extra cost to you.
We are building the Brady Adventures garage around practical DIY installs, OEM+ upgrades, honest product impressions, and real-world ownership. The current focus is the Acura Integra DE4 / 11th gen Civic platform, with Civic projects and family builds joining the channel along the way.
If you have a question about this install or want to see a specific comparison, drop a comment on the YouTube video and follow along with the next stage of the build.
In this video I install the OEM Acura splash guards (Liquid Carbon Metallic, part no. 08P00-3S5-230) on my 2024 Acura Integra A-Spec (DE4).
The goal is to make the job feel approachable before you start taking parts off the car.
Watch the Full Video
Watch the full Brady Adventures video here:
What This Video Covers
In this video I install the OEM Acura splash guards (Liquid Carbon Metallic, part no. 08P00-3S5-230) on my 2024 Acura Integra A-Spec (DE4).
What’s in the kit (front & rear guards, hardware,)
Tools you’ll need
Driver and Passanger Front splash guard install – step by step
Driver and Passanger Rear splash guard install – step by step
Fitment close-ups (alignment with rocker panels & bumper)
Final walk-around and first impressions
Why This Video Belongs on the Blog
This post gives the video a searchable home on BradyAdventures.com and makes it easier to find later as the build series grows.
Build Direction
The theme stays the same: practical installs, honest impressions, and an OEM+ approach to making the car better over time.
Parts, Tools & Affiliate Links
These are the product/tool links from the YouTube description. Some may be affiliate links, which help support Brady Adventures at no extra cost to you.
We are building the Brady Adventures garage around practical DIY installs, OEM+ upgrades, honest product impressions, and real-world ownership. The current focus is the Acura Integra DE4 / 11th gen Civic platform, with Civic projects and family builds joining the channel along the way.
If you have a question about this install or want to see a specific comparison, drop a comment on the YouTube video and follow along with the next stage of the build.
Blacking out chrome emblems is one of the cleanest OEM+ styling mods you can do — and today we’re installing the rear blacked out Acura emblem on our 2024 Acura Integra A-Spec.
The goal is to make the job feel approachable before you start taking parts off the car.
Watch the Full Video
Watch the full Brady Adventures video here:
What This Video Covers
If you’ve already seen our front emblem blackout, this completes the look and gives the Integra a much more aggressive, modern finish.
Chrome Emblem removal
Vinyl backing removal
Black Emblem installation
Before & after comparisons
This is a simple DIY mod that makes a big visual impact without permanent changes.
Why Blackout Details Matter
Chrome and bright reflectors can pull attention away from the A-Spec lines. Blackout and smoked details help the car look more cohesive without permanently changing the character of the build.
Reversible OEM+ Approach
The best part of these small styling changes is that they are approachable, relatively inexpensive, and often reversible if you ever want to return to stock.
Parts, Tools & Affiliate Links
These are the product/tool links from the YouTube description. Some may be affiliate links, which help support Brady Adventures at no extra cost to you.
We are building the Brady Adventures garage around practical DIY installs, OEM+ upgrades, honest product impressions, and real-world ownership. The current focus is the Acura Integra DE4 / 11th gen Civic platform, with Civic projects and family builds joining the channel along the way.
If you have a question about this install or want to see a specific comparison, drop a comment on the YouTube video and follow along with the next stage of the build.
In this video, I preview four genuine Acura accessories we’ll be installing soon:
This is the planning/preview side of the build, showing what is coming and why these parts made the list.
Watch the Full Video
Watch the full Brady Adventures video here:
What This Video Covers
We’re upgrading the Acura Integra the OEM+ way.
Black rear Acura emblem
Acura logo door puddle light projectors
OEM splash guards
Illuminated door sill trim
These subtle factory upgrades add premium feel, cleaner styling, and a little extra personality — all while keeping it OEM.
Why This Video Belongs on the Blog
This post gives the video a searchable home on BradyAdventures.com and makes it easier to find later as the build series grows.
Build Direction
The theme stays the same: practical installs, honest impressions, and an OEM+ approach to making the car better over time.
About the Build
We are building the Brady Adventures garage around practical DIY installs, OEM+ upgrades, honest product impressions, and real-world ownership. The current focus is the Acura Integra DE4 / 11th gen Civic platform, with Civic projects and family builds joining the channel along the way.
If you have a question about this install or want to see a specific comparison, drop a comment on the YouTube video and follow along with the next stage of the build.
In this video I show how to use tinted vinyl to smoke or black out chrome wheel emblems WITHOUT paint or permanent changes. This simple trick works for almost any wheel center cap and is a great way to tone down bright chrome, add contrast, and protect the emblem at the same time.
This fits the OEM+ direction of the channel: useful, clean, and focused on real-world ownership rather than going over the top.
Watch the Full Video
Watch the full Brady Adventures video here:
What This Video Covers
Choosing the right smoke or black tinted vinyl for wheel emblems
Working the vinyl around the raised Acura logo
Using heat to smooth the vinyl and remove bubbles
Before and after look at the smoked / blacked-out center caps on the car
Because this is vinyl instead of paint, it’s fully reversible and easy to redo if you change your mind or want to try a different shade.
Why Blackout Details Matter
Chrome and bright reflectors can pull attention away from the A-Spec lines. Blackout and smoked details help the car look more cohesive without permanently changing the character of the build.
Reversible OEM+ Approach
The best part of these small styling changes is that they are approachable, relatively inexpensive, and often reversible if you ever want to return to stock.
Parts, Tools & Affiliate Links
These are the product/tool links from the YouTube description. Some may be affiliate links, which help support Brady Adventures at no extra cost to you.
We are building the Brady Adventures garage around practical DIY installs, OEM+ upgrades, honest product impressions, and real-world ownership. The current focus is the Acura Integra DE4 / 11th gen Civic platform, with Civic projects and family builds joining the channel along the way.
If you have a question about this install or want to see a specific comparison, drop a comment on the YouTube video and follow along with the next stage of the build.
Time to introduce the newest project car to the channel. In this video we do a full walkaround and share our first impressions of our 2008 Honda Civic Si — an 8th gen Civic Si that’s joining the Brady Adventures lineup alongside our 2024 Acura Integra A-Spec (DE4) and 2016 Civic Touring
This one is more of a project introduction: what we bought, what condition it is in, and where the build could go next.
Watch the Full Video
Watch the full Brady Adventures video here:
What This Video Covers
Exterior condition and overall first impressions
What to look for if you are buying a similar Civic
Engine bay and basic mechanical overview
Things we like right away and things that need attention
Early ideas for maintenance, refresh, and future mods
If you’re into 8th gen Civic Si builds,
Why Add an 8th Gen Civic Si?
The FA5 Civic Si is a great enthusiast platform with real personality, a high-revving feel, and a lot of potential for a refresh-style build.
What Comes Next
The first step is documenting the condition honestly, then deciding which maintenance, refresh, and modification items make sense for the channel.
About the Build
We are building the Brady Adventures garage around practical DIY installs, OEM+ upgrades, honest product impressions, and real-world ownership. The current focus is the Acura Integra DE4 / 11th gen Civic platform, with Civic projects and family builds joining the channel along the way.
If you have a question about this install or want to see a specific comparison, drop a comment on the YouTube video and follow along with the next stage of the build.
Lowering the car is only half the job — now it’s time to fix the camber. In this video I install adjustable rear camber arms on my 2024 Acura Integra A-Spec (DE4), which shares the 11th gen Civic Si platform (and is also similar to many 10th gen Civic setups).
The goal is to make the job feel approachable before you start taking parts off the car.
Watch the Full Video
Watch the full Brady Adventures video here:
What This Video Covers
Removing the factory rear arms
Installing adjustable rear camber arms on the Integra DE4
Setting a reasonable starting point for camber before alignment
How this ties in with my Eibach Pro spring setup
Rear Eibach Pro rear spring install (this video)
Song: Lensko - Circles [NCS Release]
Why Suspension Comes First
Lowering springs change the look immediately, but the right setup is about more than stance. Ride height, alignment, camber correction, and tire wear all matter.
How It Fits the Build
This is part of the larger Integra DE4 / Civic Si platform suspension series, moving from spring install to camber correction and final alignment.
Parts, Tools & Affiliate Links
These are the product/tool links from the YouTube description. Some may be affiliate links, which help support Brady Adventures at no extra cost to you.
Eibach E10-201-006-01-22 Pro-Kit Performance Springs Integra/Civic Si — https://amzn.to/4qVXr1J
We are building the Brady Adventures garage around practical DIY installs, OEM+ upgrades, honest product impressions, and real-world ownership. The current focus is the Acura Integra DE4 / 11th gen Civic platform, with Civic projects and family builds joining the channel along the way.
If you have a question about this install or want to see a specific comparison, drop a comment on the YouTube video and follow along with the next stage of the build.
Time to finish the drop. In this video I install Eibach Pro rear lowering springs on my 2024 Acura Integra A-Spec (DE4), which shares the 11th gen Civic Si platform and is very similar to all 10th gen and 11th gen civics.
The goal is to make the job feel approachable before you start taking parts off the car.
Watch the Full Video
Watch the full Brady Adventures video here:
What This Video Covers
This is the rear half of the eibach pro spring installation before we move on to rear camber arms and final before and after videos.
Eibach Pro rear spring setup for the Integra DE4 / 11th gen Civic Si
Removing the factory rear springs
Installing the Eibach Pro rear springs
First look at the new ride height and stance before alignment
Rear Eibach Pro rear spring install (this video)
Song: Lensko - Circles [NCS Release]
Why Suspension Comes First
Lowering springs change the look immediately, but the right setup is about more than stance. Ride height, alignment, camber correction, and tire wear all matter.
How It Fits the Build
This is part of the larger Integra DE4 / Civic Si platform suspension series, moving from spring install to camber correction and final alignment.
Parts, Tools & Affiliate Links
These are the product/tool links from the YouTube description. Some may be affiliate links, which help support Brady Adventures at no extra cost to you.
Eibach E10-201-006-01-22 Pro-Kit Performance Springs Integra/Civic Si — https://amzn.to/4qVXr1J
We are building the Brady Adventures garage around practical DIY installs, OEM+ upgrades, honest product impressions, and real-world ownership. The current focus is the Acura Integra DE4 / 11th gen Civic platform, with Civic projects and family builds joining the channel along the way.
If you have a question about this install or want to see a specific comparison, drop a comment on the YouTube video and follow along with the next stage of the build.
Time to get the front of the Integra sitting right. In this video I install Eibach Pro front lowering springs on my 2024 Acura Integra A-Spec (DE4), which shares the 11th gen Civic Si platform. This install is also very similar to 10th gen civic platforms.
The goal is to make the job feel approachable before you start taking parts off the car.
Watch the Full Video
Watch the full Brady Adventures video here:
What This Video Covers
Eibach Pro front spring setup for the Integra DE4 / 11th gen Civic Si
Removing the front strut assemblies and factory springs
Installing the Eibach Pro front springs on the stock struts
Reinstalling the struts and torqueing everything down
First look at the new front ride height and stance
Rear Eibach Pro rear spring install (this video)
Song: Lensko - Circles [NCS Release]
Why Suspension Comes First
Lowering springs change the look immediately, but the right setup is about more than stance. Ride height, alignment, camber correction, and tire wear all matter.
How It Fits the Build
This is part of the larger Integra DE4 / Civic Si platform suspension series, moving from spring install to camber correction and final alignment.
Parts, Tools & Affiliate Links
These are the product/tool links from the YouTube description. Some may be affiliate links, which help support Brady Adventures at no extra cost to you.
Eibach E10-201-006-01-22 Pro-Kit Performance Springs Integra/Civic Si — https://amzn.to/4qVXr1J
We are building the Brady Adventures garage around practical DIY installs, OEM+ upgrades, honest product impressions, and real-world ownership. The current focus is the Acura Integra DE4 / 11th gen Civic platform, with Civic projects and family builds joining the channel along the way.
If you have a question about this install or want to see a specific comparison, drop a comment on the YouTube video and follow along with the next stage of the build.
In this video, I install the YEE PIN Center Console Tray designed for the 2023+ Acura Integra A-Spec (DE4) and 11th Gen Honda Civic Si. This tray fits perfectly into the center console, giving you organized, easy-to-access storage for coins, cards, and small essentials.
This fits the OEM+ direction of the channel: useful, clean, and focused on real-world ownership rather than going over the top.
Watch the Full Video
Watch the full Brady Adventures video here:
What This Video Covers
In the video, I walk through the main details, real-world impressions, and how this update fits into the broader Brady Adventures build plan.
Why I Like Simple OEM+ Upgrades
Not every upgrade has to be loud or expensive. Small interior and cargo-area improvements can make the car better to live with every day.
Daily Use Takeaway
These are the kinds of mods you notice in normal ownership: cleaner storage, better organization, and a more finished factory feel.
Parts, Tools & Affiliate Links
These are the product/tool links from the YouTube description. Some may be affiliate links, which help support Brady Adventures at no extra cost to you.
We are building the Brady Adventures garage around practical DIY installs, OEM+ upgrades, honest product impressions, and real-world ownership. The current focus is the Acura Integra DE4 / 11th gen Civic platform, with Civic projects and family builds joining the channel along the way.
If you have a question about this install or want to see a specific comparison, drop a comment on the YouTube video and follow along with the next stage of the build.
Time to drop the Integra. In this video I take a first look at the Eibach Pro lowering springs and adjustable rear camber arms I’ll be installing on my 2024 Acura Integra A-Spec (DE4), which shares the 11th gen Civic Si platform.
Instead of just showing the part, this one explains the reasoning behind the choice and how it fits the overall build plan.
Watch the Full Video
Watch the full Brady Adventures video here:
What This Video Covers
Eibach lowering springs for the Integra DE4 / Civic Si platform
Rear camber arm overview and why they’re needed with lowering springs
Expected ride height drop and general ride comfort goals
How this fits into the overall Integra A-Spec OEM+ build
Lowering springs change the look immediately, but the right setup is about more than stance. Ride height, alignment, camber correction, and tire wear all matter.
How It Fits the Build
This is part of the larger Integra DE4 / Civic Si platform suspension series, moving from spring install to camber correction and final alignment.
Parts, Tools & Affiliate Links
These are the product/tool links from the YouTube description. Some may be affiliate links, which help support Brady Adventures at no extra cost to you.
We are building the Brady Adventures garage around practical DIY installs, OEM+ upgrades, honest product impressions, and real-world ownership. The current focus is the Acura Integra DE4 / 11th gen Civic platform, with Civic projects and family builds joining the channel along the way.
If you have a question about this install or want to see a specific comparison, drop a comment on the YouTube video and follow along with the next stage of the build.
In this video, I install smoked vinyl tint on the rear reflectors of my 2024 Acura Integra A-Spec Technology Package (DE4).
The goal is to make the job feel approachable before you start taking parts off the car.
Watch the Full Video
Watch the full Brady Adventures video here:
What This Video Covers
In this video, I install smoked vinyl tint on the rear reflectors of my 2024 Acura Integra A-Spec Technology Package (DE4).
I’ll show the entire process, from surface prep to installation and final results, along with a few tips to get a clean, bubble-free finish.
Smoked vinyl tint install on rear reflectors
Tools and prep
Before & after results
Final impressions and OEM+ look
Discolored by ZAYFALL / zayfallmusic
Why Blackout Details Matter
Chrome and bright reflectors can pull attention away from the A-Spec lines. Blackout and smoked details help the car look more cohesive without permanently changing the character of the build.
Reversible OEM+ Approach
The best part of these small styling changes is that they are approachable, relatively inexpensive, and often reversible if you ever want to return to stock.
Parts, Tools & Affiliate Links
These are the product/tool links from the YouTube description. Some may be affiliate links, which help support Brady Adventures at no extra cost to you.
We are building the Brady Adventures garage around practical DIY installs, OEM+ upgrades, honest product impressions, and real-world ownership. The current focus is the Acura Integra DE4 / 11th gen Civic platform, with Civic projects and family builds joining the channel along the way.
If you have a question about this install or want to see a specific comparison, drop a comment on the YouTube video and follow along with the next stage of the build.
The PRL Cobra and PRL HVI are two of the most talked-about intakes for the 11th gen Civic 1.5T and 5th gen Acura Integra platforms. In this video I break down why I chose the Cobra for my 2024 Acura Integra A-Spec (DE4) instead of the PRL HVI.
Instead of just showing the part, this one explains the reasoning behind the choice and how it fits the overall build plan.
Watch the Full Video
Watch the full Brady Adventures video here:
What This Video Covers
Fitment & compatibility – Civic Si vs Integra DE4
Design differences – true fender-well cold air (Cobra) vs high-volume airbox (HVI)
Daily drivability & sound
Performance potential (including PRL’s published dyno gains for the Cobra: up to +16 hp / +9 lb-ft on a stock Civic Si, no tune required)
Future upgrade path – pairing with turbo inlet, ducts, etc.
Price and value for a real-world street car
Product and Tool Links
Why This Matters for the DE4 / Civic Si Platform
The Integra DE4 and 11th gen Civic Si share enough platform DNA that many performance parts cross over. The key is understanding fitment, sound, daily drivability, and whether the upgrade matches your goals.
Real-World Takeaway
This is less about chasing a single dyno number and more about how the car feels and sounds every day.
Parts, Tools & Affiliate Links
These are the product/tool links from the YouTube description. Some may be affiliate links, which help support Brady Adventures at no extra cost to you.
We are building the Brady Adventures garage around practical DIY installs, OEM+ upgrades, honest product impressions, and real-world ownership. The current focus is the Acura Integra DE4 / 11th gen Civic platform, with Civic projects and family builds joining the channel along the way.
If you have a question about this install or want to see a specific comparison, drop a comment on the YouTube video and follow along with the next stage of the build.